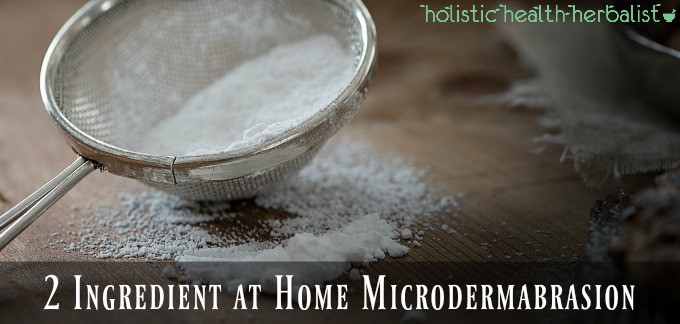
If you’ve ever gone to get microdermabrasion done, then you know it costs an arm and a leg and maybe even your first born child to get great results. This stuff’s not cheap by any means, but boy is it worth it!
When I discovered microdermabrasion about 6 years ago, I was in rapture! My skin looked dewy, fresh, and glowed with a luster I hadn’t seen in a loooong time (let’s say during my pre-acne era). I was hooked, but there was just one teensy problem…getting microdermabrasion is expensive, usually costing around $100 per visit if you’re lucky…ouch. So I decided to look for a natural, homemade alternative that works just as well.
What is Microdermabrasion and Does Microdermabrasion Work?
If you’re not familiar with microdermabrasion, it’s a procedure done by licensed estheticians that gently remove the outside layer of dead skin cells using a super fine crystal paste (or sometimes even a diamond-tipped wand…fancy!). They load up this crystal paste onto the end of a suction wand and then scour your skin until fresh skin is visible.
Does microdermabrasion hurt?
In my experience, it’s actually kind of nice feeling, though some people may need the gentle setting if you have sensitive skin.
The end result is lustrous, glowing skin that I think everyone should be able to afford.
Today, I’m going to teach you how you can get a spa quality experience for just pennies, and it’s just 2 ingredients!
2 Ingredient at Home Microdermabrasion Recipe
What You’ll Need
• 1 teaspoon baking soda (this is what polishes away dead skin cells)
• ½ teaspoon of raw honey(soothes, moisturizes, and heals the skin)
• 1 drop Lavender or Tea Tree
essential oil (anti-bacterial, prevents breakouts, and soothes irritation)
Loving Preparation - 2 Ingredient at Home Microdermabrasion
• In a small dish, mix the baking soda and raw honey
together until you form a paste (add your 1 drop of essential oil if using)
• Splash your face with warm water to open your pores
• Massage into skin in very gentle, circular motions concentrating on problem areas. Do this for at least 1 minute
• Rinse well with cool water and pat dry. You may notice some redness. This is normal and usually goes away after a few hours
• Follow with a generous spritz of rose water to rebalance your skin's pH levels (you can learn how to make your own here) then moisturize with a drop or two of healing argan oil
• Repeat in 1 week (sometimes you can get away with doing at home microdermabrasion more often if you have less sensitive skin, but I wouldn’t exceed twice per week)
Since your skin will be sensitive afterward, be sure to avoid direct sunlight for the rest of the day to prevent further sensitivity and redness. You want to keep your fresh new skin protected!
Rose Water is Essential
Baking soda is quite alkaline and can upset the pH of your skin’s natural acid mantle. In order to restore your skin’s natural pH, you need to use a toner afterward or you might end up with either very dry skin, or very oily skin. We don’t want either of those! But you don’t have to worry, rose water just so happens to be a perfect pH balancer and quite healing for your new glowing complexion. Learn how to make herbal waters here and why you should use rose water here.
If you need further guidance on how to rebalance a damaged skin barrier, please read my barrier repair article here.
Have you ever made your own microdermabrasion treatment at home? Please share in the comments below!
You may also enjoy reading:
Perfect Pout Peppermint Lip Scrub
Whipped Shea Butter Sugar Scrub
Rose Petal Body Scrub Recipe
Invigorating Coffee and Coconut Body Scrub
Skin Whitening Face and Body Scrub
Balsam Fir Sugar Scrub




Lizzie says
I'll start by saying I'm 75, and my skin is gorgeous. Sure, a few wrinkles but by golly, they're gorgeous wrinkles. Have consumed a Tbsp. of apple cider vinegar every a.m. for 50+ years, and once a week use a "scrub" made with coffee (ground, not used), white sugar and coconut oil. Massage gently, rinse with warm water and get all the coconut oil off with a clean washcloth. Tone with Witch Hazel and go about your glow. Never been injected, don't intend to be; never gone under a scalpel; likewise don't intend to. But guess what? My face is my private masterpiece.
Angie says
Thank you for this interesting info. I was going to buy a machine today but would rather use a natural procedure. Do you recommend doing this once a week?
Tash says
Hi Angie!
I think once a week would be just fine! Any more than that and you may risk irritating the skin.
Drea Riley says
Hello!!! I am a liscenced esthetichian. I was reading your post and wanted to let you know that warm water does not open pores. Pores are always open. They cannot close because they do not have muscles. The reason behind using steam or warm water is actually to assist in product penetration and pore cleaning. If you want to unclog your pores, do your skin a favour and use an exfoliant with salicylic acid. That’ll get inside the pores, freeing them from all the gunk inside.
Tash says
Hi Drea!
Very interesting! Thanks for the info 🙂
Elize Crouch says
Super cool tutorial. I havent seen such an easy and effective at home concoction before.
Tash says
Thanks Elize! I hope you found it helpful!
Hallie says
Instead of rose water, can I use apple cider vinegar afterwards?
Tash says
You can but make sure to dilute it with water 🙂
home microdermabrasion machine says
I really need to try this tips of yours. Until now I was using one of microdermabrasion machines for home usage.
Tash says
Yes!
It's super easy to make your own microdermabrasion scrub at home and get great results!
Maryam says
Hi, would this be good for my acne prone, sensitive skin?
Tash says
Hi Maryam!
I have used this on my own acne prone skin and it has worked great! Of course, I am very gentle when I use it since I also have very sensitive skin. So far I haven't had any issues 🙂
Brian says
This microdermabrasion treatment looks like it will help restore low collagen levels. I may try it - thanks!
Debi DeVincent says
This sounds amazing! one ?...I've been to the beach and I have a good tan...If I use this now , would my tanned face still stay tanned?
Tash says
Hi Debi, it should stay tanned. Microdermabrasion does take time to make a huge difference in hyperpigmentation, including tans 🙂 You should be fine!