
Just because you have clogged pores or blemishes doesn't mean you can't enjoy a relaxing and rejuvenating facial. Now, I'm not talking about going to a spa and getting one (unless of course it's all natural), I'm talking about making your own facials for acne with simple ingredients that work in the comfort of your own home.
You don't need to go to the chemist, or a pharmacy, a beauty store, or the dermatologist to calm redness and heal acne. All you need are a few tried and true ingredients that can be found in your kitchen pantry or bathroom cabinet to create a wonderful spa-like experience.
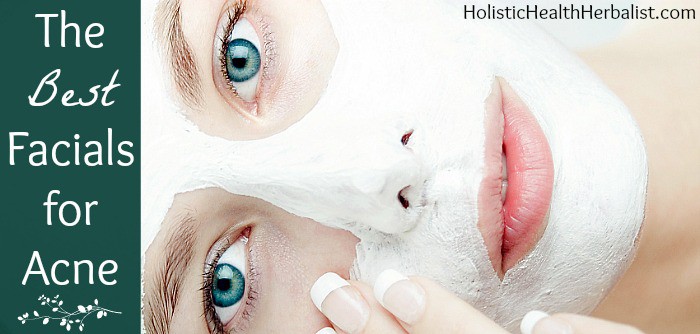
The Best Facials for Acne
These facials may seem too simple to be true, but believe me when I say that these really work! Not only are they completely natural, they are gentle AND effective. You need all three of these factors in order to gently heal acne from the outside while you heal from the inside. Using harsh scrubs, face washes, and spot treatments that you can pick up at the store are NOT the answer! Often these acne treatments make redness and irritation worse. Plus your skin gets used to the chemicals in them and you end up needing to use stronger and stronger treatments.
Using simple ingredients at home will offer the same benefits without dependency or the need to increase potency.
Here are some of my favorite facials for acne:
Oatmeal Face Scrub
Everyone knows that oatmeal is great for smooth beautiful skin. Its soothing properties help calm redness, smooth texture, and moisturize dry dehydrated skin. Oatmeal is also great for reducing inflammation caused by acne vulgaris. Using ground oatmeal as a simple homemade scrub will also gently slough off dead skin cells, an important step in preventing blemishes.
To Use
• Add ¼ cup of dry oatmeal![]() to a personal blender ( I like this one
to a personal blender ( I like this one![]() )
)
• Pulse until you have a scrubby consistency, pour it into a bowl
• Next, add a dash of rose water ![]() (optional) and a few drops of essential oil. Tea tree
(optional) and a few drops of essential oil. Tea tree![]() works great for this.
works great for this.
• Mix well
• Now add boiling water a little at a time until you get a slightly runny but thick paste (you want the paste to be spreadable and easy to scrub with)
• Splash your face with warm water to open the pores
• Scoop out some scrub and work it into your skin in circular motions
• Massage for a full minute, then rinse with cool water
• Follow with one of the face masks mentioned below
• Rinse with cool water
• Spritz with rose water and follow with your favorite facial oil
Don't want to make your own oatmeal face scrub? Try this one![]() !
!
Raw Honey Face Wash and Mask
I could sing odes to this miraculous remedy! If you haven't already figured out how much I adore raw honey from previous posts, let me say it again: raw honey is one of the best natural acne treatments there is. It is known for its ability to kill acne-causing bacteria as well as improve the texture of skin making it appear full and supple. It will calm redness and bring down swelling and inflammation. Raw honey can also prevent future breakouts with regular use. It seems too simple to be true, but NEVER discount the effectiveness of raw honey for acne.
Raw Honey Acne Facial
• 1 teaspoon raw local honey![]() (raw is VERY important otherwise the honey will not have the benefits needed for this mask to work)
(raw is VERY important otherwise the honey will not have the benefits needed for this mask to work)
To Use
• Cleanse your face with a small amount of raw honey and rinse well with warm water in order to open the pores.
• Gently pat try
• Evenly apply more raw honey to the skin
• Leave on for at least 20 minutes (I have been known to leave it on for hours!)
• Rinse gently with cool water
• Moisturize per usual (I use rose water and rosehip seed oil![]() )
)
• Repeat daily as preferred or at least 2-3 times per week for best results
Manuka Honey Facial
A cousin of the tea tree, manuka is renowned for its potent medicinal qualities. When bees harvest pollen from the manuka tree, these qualities are transferred into the honey making it incredibly powerful against acne as a mask or spot treatment. Manuka's unique healing abilities also make it perfect for open wounds so if you have scratched or picked at your skin, manuka is the perfect fix.
Manuka honey comes in many degrees of potency (some seem a bit outlandish, so be careful about which brands you choose) ranging from 5+ UMF (unique manuka factor) to around 28+ UMF. I normally get the brand Wedderspoon![]() , but I have found that Manuka Honey Bio Active
, but I have found that Manuka Honey Bio Active![]() is also a great brand to use and I trust their potency to be unadulterated.
is also a great brand to use and I trust their potency to be unadulterated.
In general, the higher the UMF/bio active number the more potent the manuka honey is. I aim for at least UMF 12+ because I have found that anything lower than that tends to be less effective for the crazy price tag. Yes, manuka honey is expensive BUT it works amazingly well.
Manuka Honey Facial Mask
• ½ teaspoon UMF 12+ or higher of manuka honey
• 1 drop tea tree essential oil![]() (optional)
(optional)
To Use
• Cleanse face with warm water and pat dry
• Mix 1 drop tea tree essential oil into the manuka honey![]() if using
if using
• Apply evenly to skin
• Let sit for at least 20-60 minutes
• Rinse with cool water
• Spritz with flora water (I love rose but you can use lavender, holy basil, tea tree, peppermint, etc.)
• Apply facial oil like rosehip, argan![]() , or jojoba
, or jojoba![]()
• Repeat 2-3 times per week
Rhassoul Clay Face Mask
Known for its ability to literally pull out blackheads and banish blemishes, rhassoul clay is a must have for acne sufferers. I love this clay so much, I wrote a whole article about it!
To Use
• Cleanse face and rinse with warm water to open the pores
• Pat dry
• Mix enough rose water with rhassoul clay![]() to makes a spreadable paste
to makes a spreadable paste
• Evenly spread the rhassoul clay over the face, especially over problem areas
• Let the clay completely dry before rinsing, at least 20 minutes
• The longer it sits, the more impurities it will suck up (I shoot for 30 minutes tops before the mask starts flaking off)
• Repeat 2-3 times a week
Slippery Elm Gel Mask
This is one of my all-time favorite masks! Not only is it super soothing after a good face scrub, it is also very healing.
Slippery elm comes from the inner bark of, you guessed it, the slippery elm tree. Its mucilaginous (slimy) texture when mixed with water lends a super satisfying mask for even the most sensitive skin types.
You may have used this amazing herb for things like:
• Sore throat
• Indigestion
• Sour stomach
• Intestinal distress
But it is also amazing for topical use as well, especially acne!
Using slippery elm on the skin will:
• Plump dry tired skin
• Reduce inflammation caused by acne
• Reduce redness
• Even out complexion
• Heal picked at skin!
Slippery Elm Gel Mask
• 1 teaspoon slippery elm powder (you can get it here![]() and here
and here![]() )
)
• 4 TB Aloe Vera juice (I like this brand![]() )
)
• 1-2 drops lavender essential oil![]() (optional)
(optional)
To Use
• Mix the slippery elm powder and aloe juice together until it forms a gel
• Next mix in the lavender essential oil if using
• Apply the mask to clean dry skin
• Leave on for 20-30 minutes
• Rinse with cool water
• Repeat 2-3 times per week
• Store the leftover mask in a small container in the fridge. It will last 4-6 weeks!
Peppermint Hydrosol Toner
Hydrosols aka floral waters are hands down the BEST toners for the skin. Not only do they even out skin tone, smooth fine lines, and reduce redness, they also balance the PH of your skin. PH balance is super important for preventing acne.
Our skin's acid mantle can easily become imbalanced from bathing in tap water. If we don't restore the skin back to its normal PH level (4.5-5.5), acne will rear its ugly head…literally! All disease, illnesses, and other inflictions LOVE acidity and it's no different for acne causing bacteria. Tap water has a normal PH of 6-8.5, the perfect PH conditions for acne causing bacteria.
Hydrosols can return the skin back to its normal PH levels. You can learn about how I make my own peppermint hydrosol here. I also have an article about rose hydrosol and how to make it here. Alternatively, you can buy peppermint hydrosol, I like this brand![]() .
.
To Use
• After cleansing the skin or after using any type of facial mask, rinse the skin with cool water
• Pat dry
• Liberally spritz the face with hydrosol
• Either let it a dry OR apply your favorite facial oil before it dries completely
I apply hydrosol every time water hits my face.
Rosehip Face Serum
Rosehips are little Vitamin C powerhouses. Not only are they beneficial taken internally, they are also great as a serum.
Rosehip seed oil is naturally high in anti-oxidants and is very restorative and well tolerated by all skin types. One of my favorite uses for it is for preventing scars and keeping fine lines at bay, but most of all, I use it because it doesn't break out my skin!
Here's how to make your own rosehip facial serum.
To Use
• After using hydrosol, apply in an even layer while the hydrosol is still wet
• Massage the serum into skin
• Use as your regular daily moisturizer
Don't want to make your own? Get it here![]() !
!
Crushed Pearl Finishing Powder
Sounds expensive and luxurious no? Actually, using pearl powder as face care is quite economical!
Pearl powder has been used for thousands of years in Chinese medicine. Empresses were known to use it as a dusting powder on their faces to keep their complexions smooth and porcelain. Don't worry, pearl powder won't make your skin white, rather it will keep the redness away while making your skin feel silky smooth! I often have redness around my nose and mouth, so this powder has been a godsend! Nothing else has worked so well as pearl powder.
To Use
• Empty one capsule of pearl powder into a small bowl (I like this brand![]() ). Alternatively, if you are using a loose pearl powder, put ⅛ teaspoon into a bowl. (I like this loose pearl powder
). Alternatively, if you are using a loose pearl powder, put ⅛ teaspoon into a bowl. (I like this loose pearl powder![]() )
)
• Take a clean dry powder brush![]() and swirl it in the pearl powder
and swirl it in the pearl powder
• Apply evenly to face, especially on areas where redness occurs most
• Apply as often as you like throughout the day
Pearl powder is very comparable to conventional setting powder in that it doesn't leave any color on the skin. In fact, you could technically consider pearl powder to be more of a sheer mineral makeup. It leaves your skin silky, luminous, and matte which is perfect for my oily skin!
The Ultimate Facial for Acne Prone Skin
To pull all of this information together into one luxurious at-home spa experience here's what you do:
1. Begin with "washing" your face with raw or manuka honey.
2. Rinse and then apply the Oatmeal Face Scrub and massage into the skin for 1 minute.
3. Rinse the scrub off with warm water.
4. Apply one of the above face masks.
5. Rinse with cool water.
6. Gently pat dry with a soft cloth.
7. Spritz the face liberally with hydrosol.
8. While the hydrosol is still wet, apply the Rosehip Acne Serum
9. Wait for the serum to soak into the skin for 10 minutes.
10. Next, apply an even layer of pearl powder.
11. Feel amazing!
What are your favorite at home facials for acne? What is your favorite natural acne treatment? Please share below!
You may also enjoy:
Homemade Drying Lotion for Acne
The Complete List of Comedogenic Oils
The 7 Step Routine You Need to Get Clear Skin


ALDITHA says
Thanks for your sahring to aking my own facials for acne with simple ingredients that work in the comfort of my own home!
Jocasta says
Hi Tash,
I love your articles and I'm learning a lot from them! 🙂
I was hoping I could get you advice on products for post-acne - which oils and clay mask would you recommend for facial skin that's recovered from acne - still with a few tiny spots - and hyperpigmentation?
Thank you,
Jocasta
Anna @Green Talk says
I couldn't stop clicking on all the links above. I love rose hips and rose water. Can I use these remedies on a teenager?
Tash says
Hi Anna!
You can definitely use these for a teen 🙂 Thanks for stopping by!